1.Introduction
As part of the MyEyedro building automation system interface, the BACnet to MyEyedro User Guide provides details on how to configure the transfer of BACnet measurement data to MyEyedro (my.eyedro.com).
This is typically used to view gas, water, and electricity meter data within MyEyedro that already exists in a company’s building automation system (BAS).
The main steps include how to:
- Purchase and use an Access Key
- Install and configure CAS Software
- Configure a virtual Eyedro BAS Device within MyEyedro
2.Access Keys
In order to add an Eyedro BAS Device to your MyEyedro user account, you will need an Access Key which can purchased through your local Eyedro Reseller.
Once purchased, the Access Key(s) will be added to your MyEyedro account so you may assign to your new Eyedro BAS Device(s).
This Access Key will be required when adding a BAS device in the CAS Software configuration.
3.CAS Software
The Chipkin Automation Systems (CAS) Gateway Software is a protocol converter that sends data from a BAS device (eg. BACnet gas meter) to MyEyedro.
The gateway operates by reading data from a downstream device, then storing the received values into an internal database. If the values change, or on a specific timeout, the data is transmitted to MyEyedro.
The gateway must be preconfigured to read from specific BAS devices.
3.1.Installation
After you have your Access Keys, you will be provided with a link to download the CAS software.
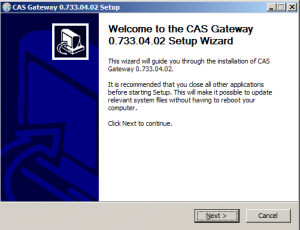
Double click the file to run the installer, and follow the instructions on the Setup Wizard.
Run the CAS Gateway after successful installation to view the Gateway’s configuration settings.
3.2.Settings
To view the gateway’s configuration settings, type the following URL into a Web browser’s address bar: http://192.168.1.113/bin/iothttp/config/ where “92.168.1.113” represents the IP address of your gateway.
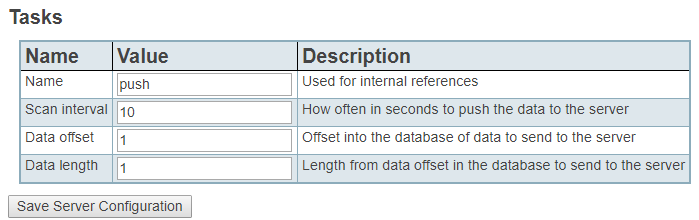
Tasks Table
The tasks table is used to define the specific data that is being monitored by the IoT HTTP driver.
- Name – Internal reference name for this task. This name is not sent to the HTTP driver and can be anything you want. Default: {Blank}
- Scan interval – This parameter is used to define how often in seconds to send a snapshot of the current value in the database to the HTTP server. The data in the snapshot may not have changed in this time. If this value is set to zero (0) “Change of value” will be used instead of a snapshot. When in “Change of Value” is set only the values that change will be sent to the HTTP server. Default: 0 (Change of Value)
- Data offset – The starting location of the data in the internal database. Default: 1
- Data length – The length of data from “Data offset” that is used when sending the payload to the HTTP server. Default: 1
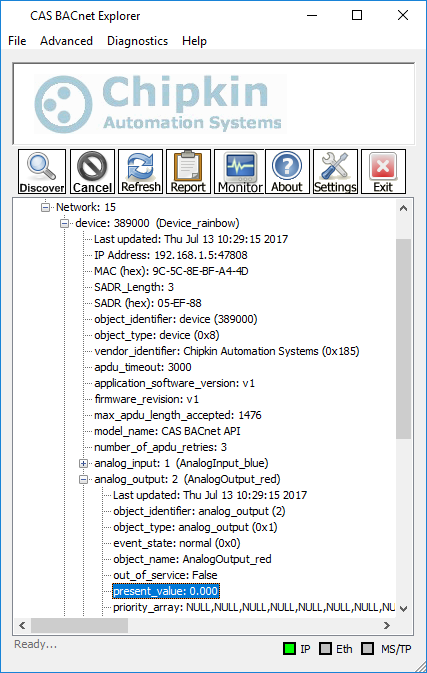
3.3.Discovering your Devices
Follow the next steps to discover the BACnet IP devices, objects, and properties on your network that you want to send to the Eyedro system using the HTTP IoT driver.
- Close the CAS Gateway if it is running. You cannot have multiple BACnet clients using the same port (47808) running on the same computer at the same time.
- Download and install the CAS BACnet Explorer: http://www.chipkin.com/products/software/bacnet-software/cas-bacnet-explorer/
- Run the CAS BACnet Explorer, discover the BACnet devices, objects and properties that you are interested in. For more information on how to use the CAS BACnet Explorer, please see the CAS BACnet Explorer’s Manual.
- Click the “Report” button in the CAS BACnet Explorer to create an offline report of the BACnet devices, objects and properties that the CAS BACnet Explorer has discovered.
You should now have a list of BACnet devices, objects, and properties that you can use to configure the CAS Gateway BACnet IP tasks.
3.4.Adding your Devices
Follow the next steps to add or insert your devices to the gateway and start collecting data.
- Insert the BACnet device. This will fill out columns in the Report section.
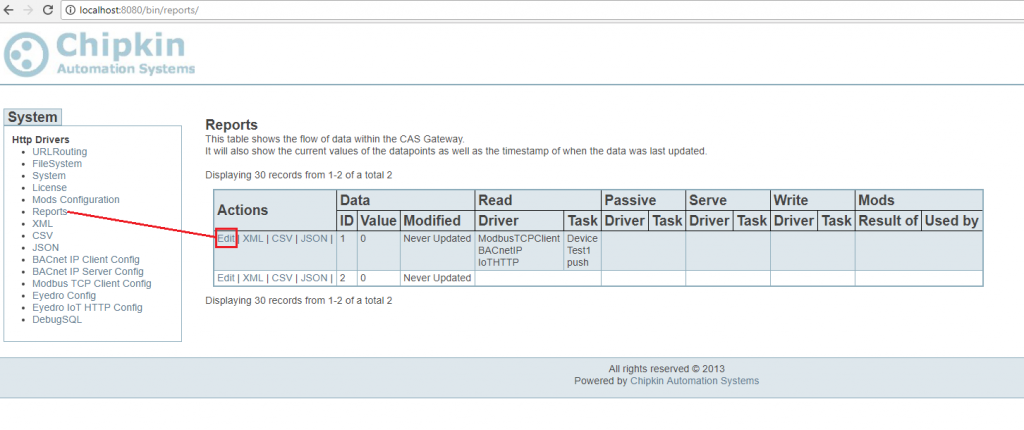
- Go to the Reports section and find the data points you want MyEyedro to save.
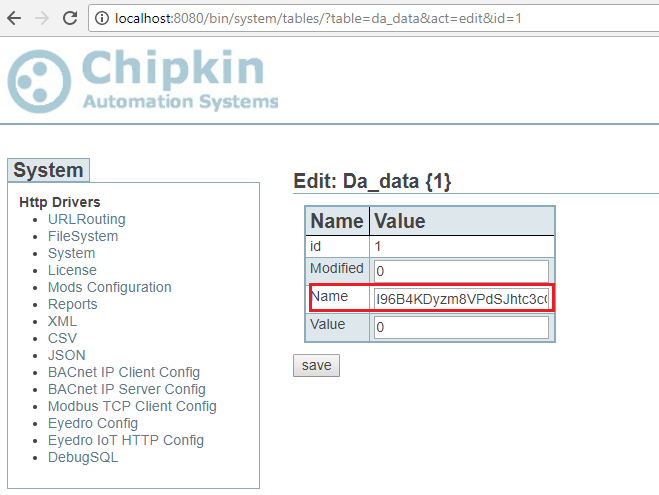
- Enter the Access Key that was purchased from Eyedro Sales into the Name field. Each data point requires its own Access Key.
3.5.Adding BACnet IP tasks
To read values from BACnet devices, you have to create new BACnet tasks in the CAS gateway. The values will be stored in an internal database and then pushed to MyEyedro via the HTTP IoT driver.
- Close the CAS BACnet Explorer if it is running. You cannot have multiple BACnet clients using the same port (47808) running on the same computer at the same time.
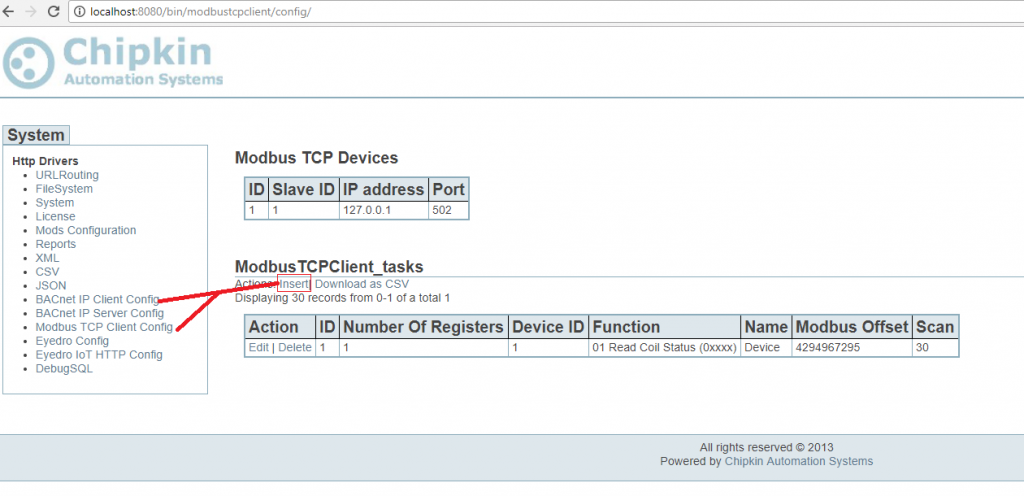
- Go to the “BACnet IP Client configuration” page: http://<IPAddress:8080>/bin/bacnetipclient/config/ *
- Click “insert” under the BACnetIP_Tasks table.
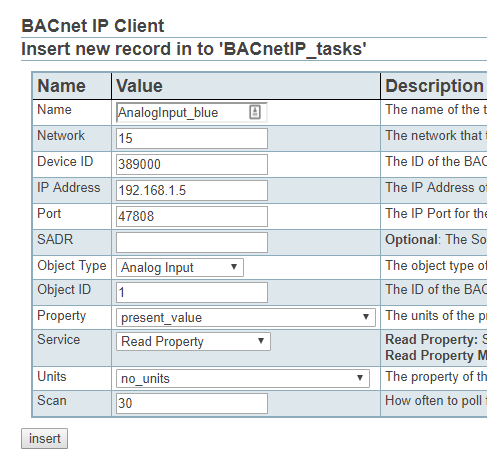
- Using information from the report from the CAS BACnet Explorer add a new BACnet IP task into the CAS Gateway to read a BACnet object property.
- After adding your first BACnet IP task. Restart the CAS Gateway. This will enable the BACnet IP driver.
- Go to the “Reports” page in the CAS Gateway http://<IPAddress>:8080/bin/reports/* to ensure that the BACnet IP task has been set up correctly and is receiving data.

* Note: Replace <IPAddress> with your IP address or “localhost”.
3.6.Adding Eyedro HTTP Task
To send data from the internal database to MyEyedro using the IoT HTTP driver, you will have to create a new IoT HTTP task for the CAS Gateway.
- Goto the “Eyedro IoT HTTP Config” page: http://<IPAddress>:8080/bin/iothttp/config *
- Fill in the form with information provided by Eyedro. See the Settings section for more information about each field in the Tasks table.
- Validate that the IoT HTTP Driver is sending data to MyEyedo servers.
- Go to the “stats” page: http://<IPAddress>:8080/bin/system/info *
- ensure that the “IoTHTTP.task.###.read” tasks are increasing
- ensure that “IoTHTTP.task.1.read.status” has a value of “OK”
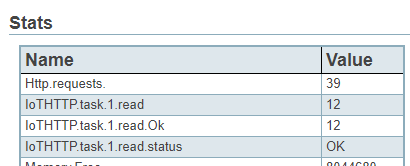
* Note: Replace <IPAddress> with you IP address or “localhost”
4.MyEyedro
Once your Eyedro BAS Devices are linked to your MyEyedro account, and CAS Software configuration is complete, you will be able to see your live water meter or gas meter data on your Utility Dashboard, alongside your Eyedro electricity monitor!

For more information on how to use and configure MyEyedro, make sure to visit our online MyEyedro User Guide and the Support page.
4.1.Adding Devices
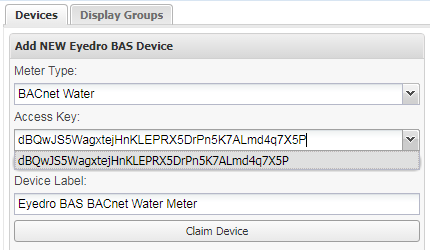
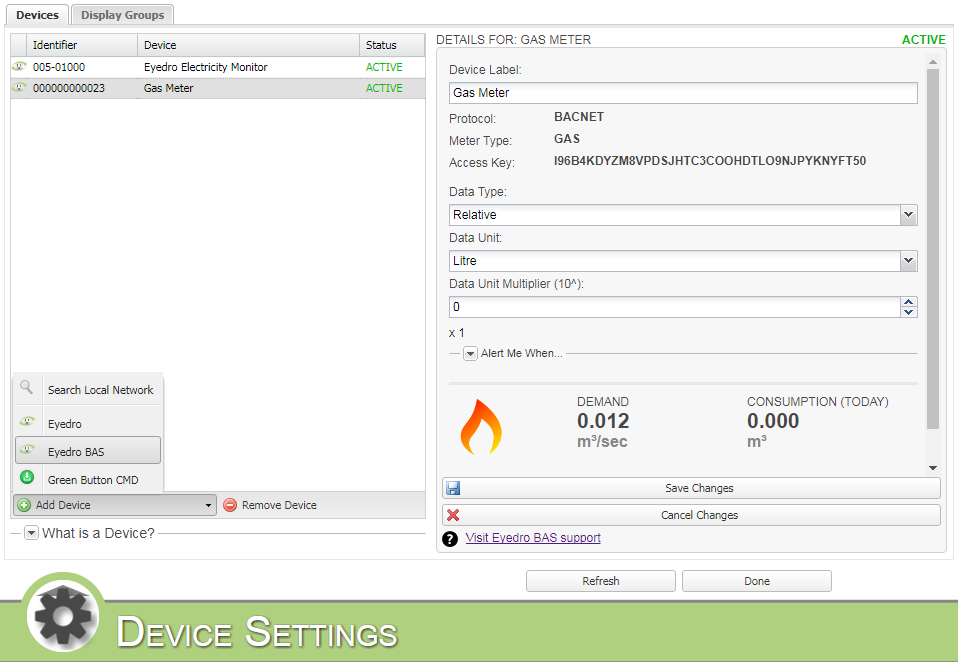
To add your Eyedro BAS device to MyEyedro, open up “Device Settings” through the Settings Menu.
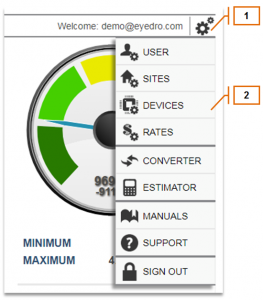
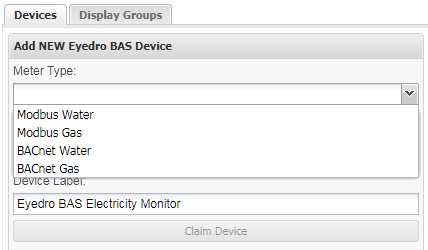
- Go to the “Devices” tab, and click on “Add Device“. Select “Eyedro BAS” from the list of options.NOTE: You will need to have Access Keys added to your account in order to claim an Eyedro BAS device.
- Under “Meter Type“, specify whether you have a Modbus Water or Gas meter, or a BACnet Water or Gas meter.
- Under “Access Key“, select the Access Key you were provided. Each device needs to have its own Access Key.
- Optional: update the “Device Label” which will be used as the device’s display name in the Devices List.
- Click on “Claim Device“.
NOTE: A default “Display Group” will be added for each new Device claimed under your account.
4.2.Utility Dashboard
The MyEyedro Utility Dashboard provides a high-level overview of your electricity, water, and natural gas usage.
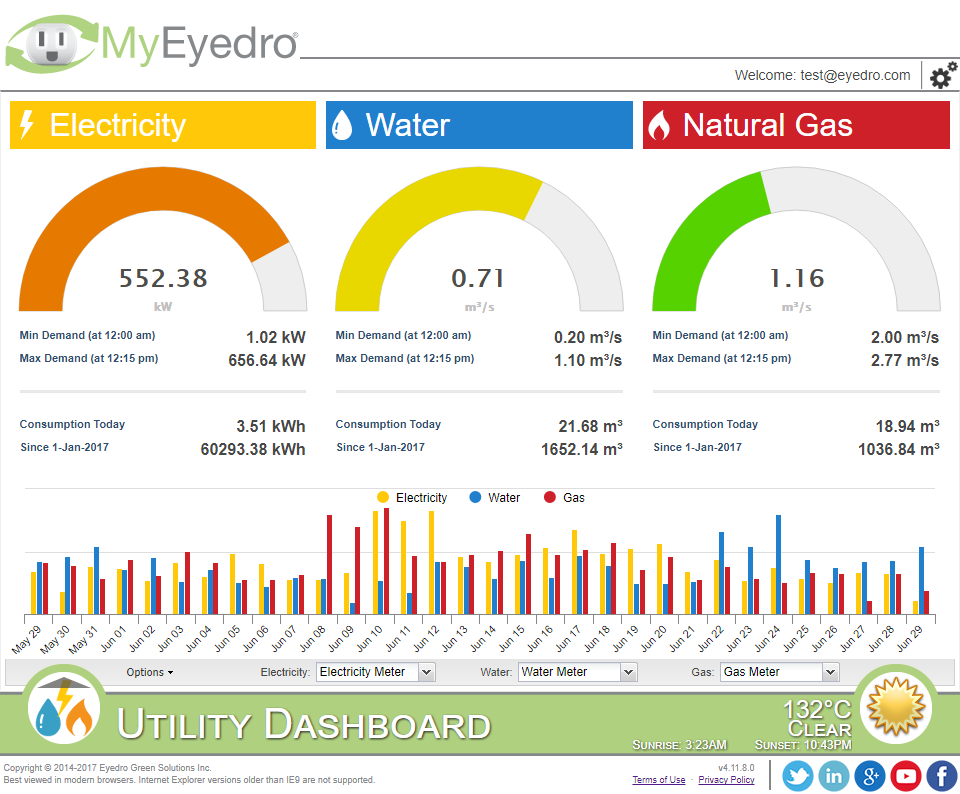
You can specify which “Display Groups” are associated with which utility by selecting the appropriate Display Group from the list in the footer menu bar.
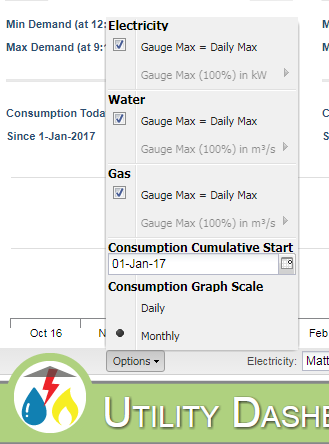
Selecting the “Options” button will allow you to make changes to the Dashboard view.