Switch From Ethernet to WiFi With the Browse Feature
Have you connected your Eyedro to communicate by Ethernet but have decided to switch to a WiFi connection instead?
Here is a quick list of the steps involved in making the switch (more detailed instructions follow).
To make the change from Ethernet to WiFi, go to the Configuration menu, then select Devices.
- Select your Eyedro device from the Device list.
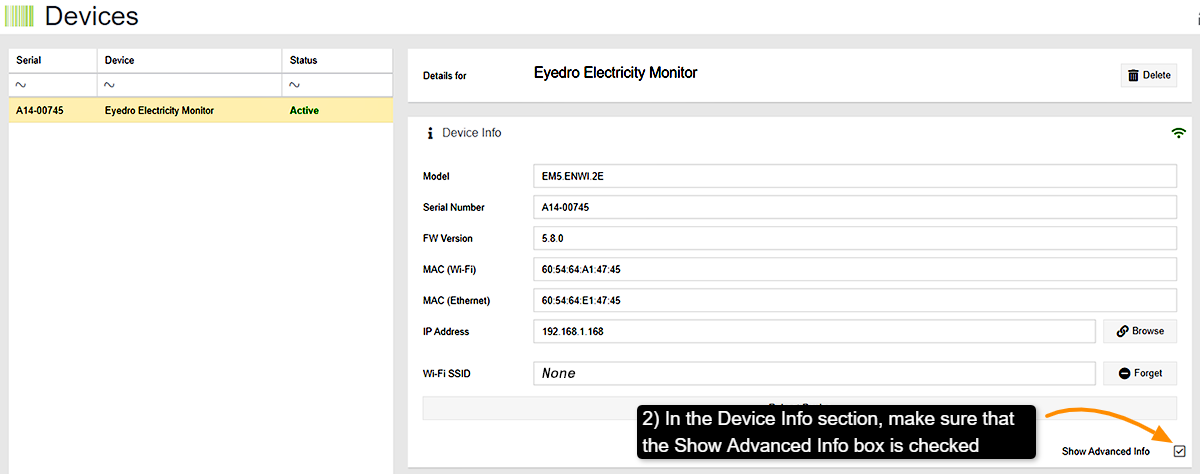
- In the Device Info section check the Show Advanced Info box.
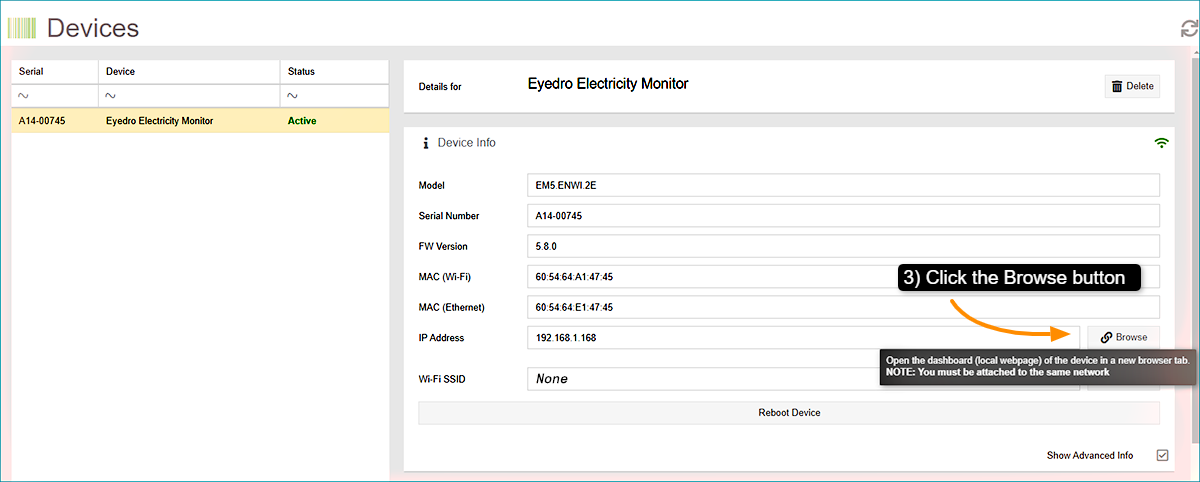
- Click the Browse button.
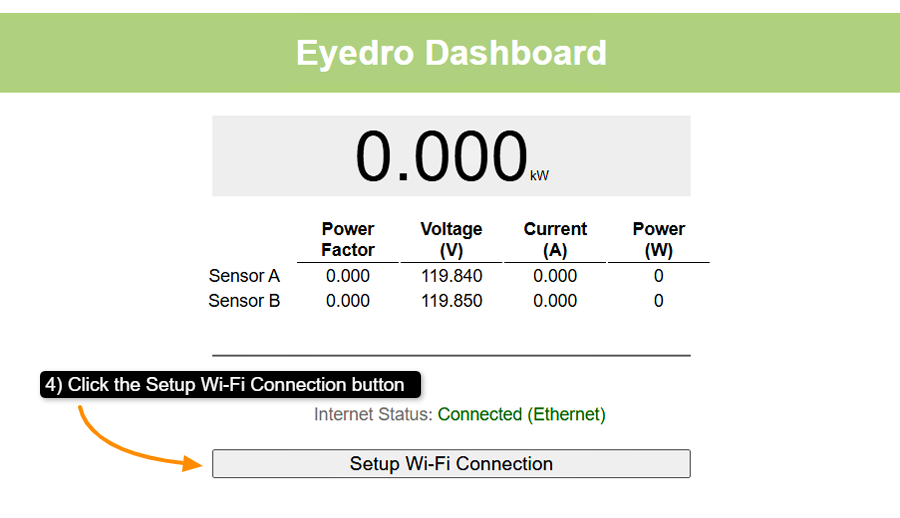
- The Eyedro Dashboard will open up in a new browser window. Click the Setup Wi-Fi Connection button.
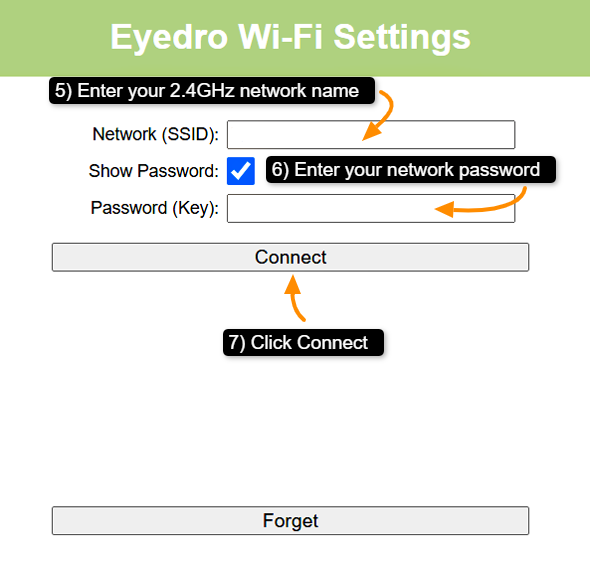
- Enter your WiFi network name in the Network (SSID) field (must be 2.4 GHz).
- Enter your network password in the Password (Key) field.
- Click Connect!
Step One
Select your Eyedro device from the Device list.
Step Two
Make sure that Show Advanced Info is checked (opens advanced settings):
Step Three
Select the network Browse button to open the Eyedro Dashboard webpage.
Note that your computer (browser) must be connected to the same network as the WiFi network that you intend to connect to.
Step Four
Once the Eyedro Dashboard opens select the Setup Wi-Fi Connection button:
Step Five
When the Eyedro Wi-Fi Settings page opens up, enter your network name and password then click Connect. Wait for 30 seconds then disconnect the Ethernet cable from your Eyedro. You may also need to unplug the power to the module for 30 seconds to reset the device.
Energy Monitoring Made Easy!
Eyedro User Manuals
For detailed Eyedro product specifications, installation, and MyEyedro cloud software information please refer to the following Eyedro manuals:
MyEyedro Cloud Software Manual
