Select Page
Super Eyedro Tips: Switch From Ethernet to WiFi Connection

Super Eyedro Tips: Switch From Ethernet to WiFi Connection

Switch From Ethernet to WiFi With the Browse Feature

Have you connected your Eyedro to communicate by Ethernet but have decided to switch to a WiFi connection instead?


Here is a quick list of the steps involved in making the switch (more detailed instructions follow).


To make the change from Ethernet to WiFi, go to the Configuration menu, then select Devices.


  1. Select your Eyedro device from the Device list.
  2. In the Device Info section check the Show Advanced Info box.
  3. Click the Browse button.
  4. The Eyedro Dashboard will open up in a new browser window. Click the Setup Wi-Fi Connection button.
  5. Enter your WiFi network name in the Network (SSID) field (must be 2.4 GHz).
  6. Enter your network password in the Password (Key) field.
  7. Click Connect!


Step One

Select your Eyedro device from the Device list.

Browse network step 1 in MyEyedro Devices

Step Two

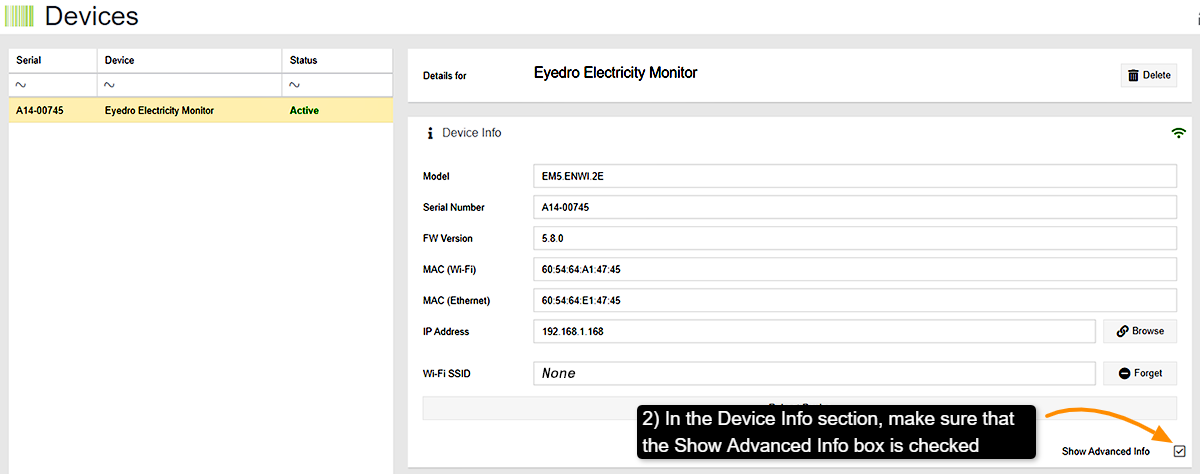
Make sure that Show Advanced Info is checked (opens advanced settings):

Browse feature in MyEyedro step 2

Step Three

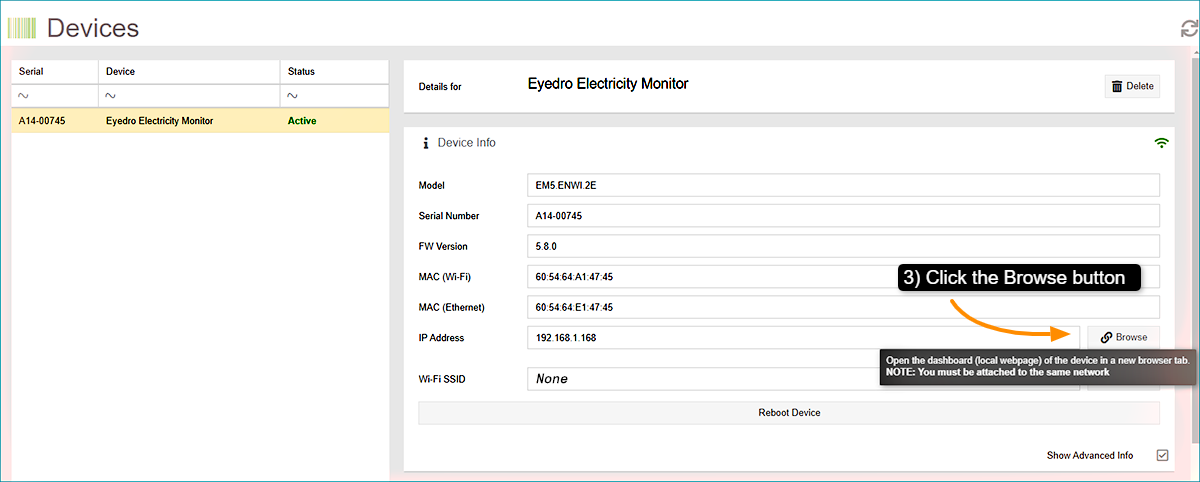
Select the network Browse button to open the Eyedro Dashboard webpage. 

Note that your computer (browser) must be connected to the same network as the WiFi network that you intend to connect to.

Switching from Ethernet to WIFi with the Browse feature in MyEyedro Step 3

Step Four

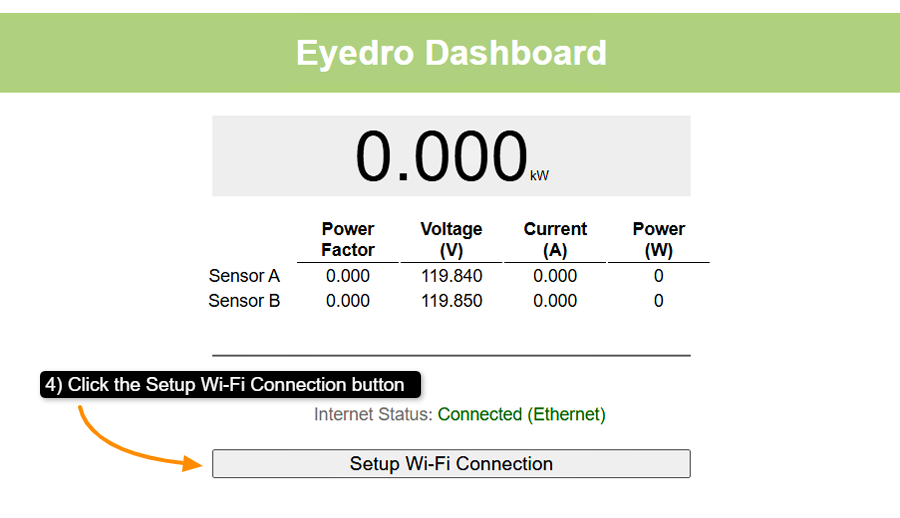
Once the Eyedro Dashboard opens select the Setup Wi-Fi Connection button:

Switching from Ethernet to WIFi with the Browse feature in MyEyedro Step 4

Step Five

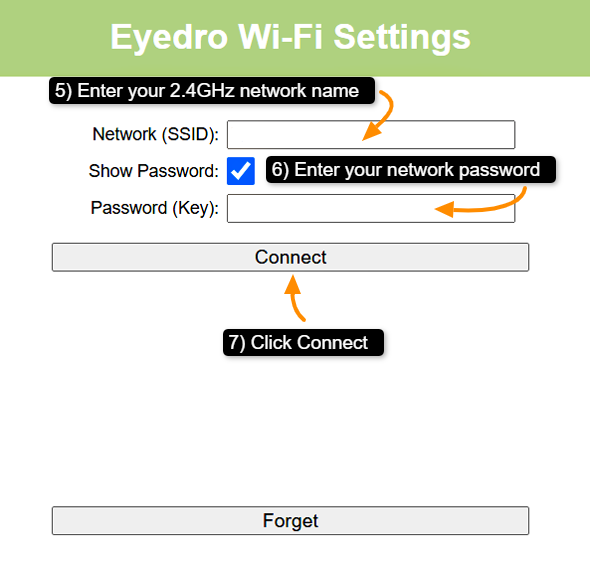
When the Eyedro Wi-Fi Settings page opens up, enter your network name and password then click Connect.  Wait for 30 seconds then disconnect the Ethernet cable from your Eyedro.  You may also need to unplug the power to the module for 30 seconds to reset the device.

Switching from Ethernet to WIFi with the Browse feature in MyEyedro Step 5

Energy Monitoring Made Easy!

Eyedro User Manuals

For detailed Eyedro product specifications, installation, and MyEyedro cloud software information please refer to the following Eyedro manuals:

MyEyedro Cloud Software Manual

Eyedro Home Products Guide

Eyedro Business Products Guide

Eyedro Technical Support

Super Eyedro Tips: Get MyEyedro Cloud Support

Super Eyedro Tips: Get MyEyedro Cloud Support

How to Get MyEyedro Help

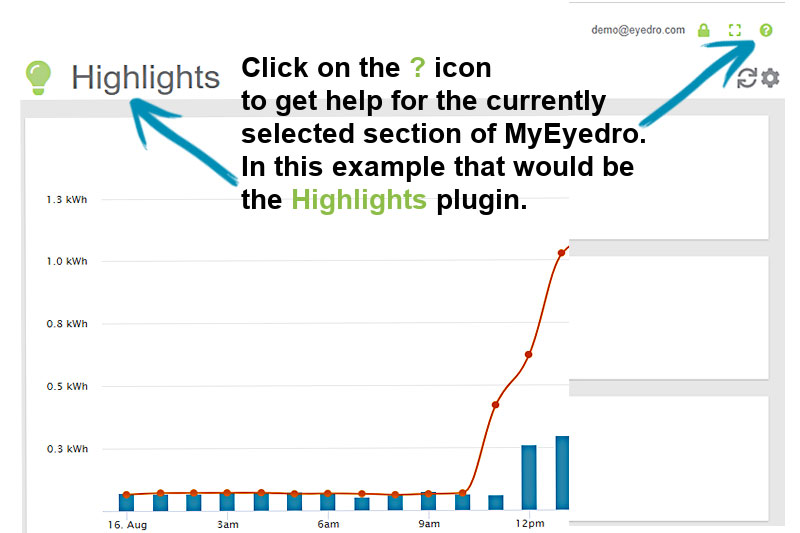
Did you know that MyEyedro has an extensive User Guide to help you with any section of the platform? Whether you need cloud support for plugins, configuration, or tools, simply click on the ? icon at the top right of the page and you’ll be directed to the corresponding section in the MyEyedro User Guide. The MyEyedro User Guide provides step-by-step instructions and helpful tips to make your experience with MyEyedro easy and efficient. 

Help is just a click away!

The question mark icon on each page in the MyEyedro cloud platform that directs the user to the appropriate section in the MyEyedro manual.

Click on the ? symbol.

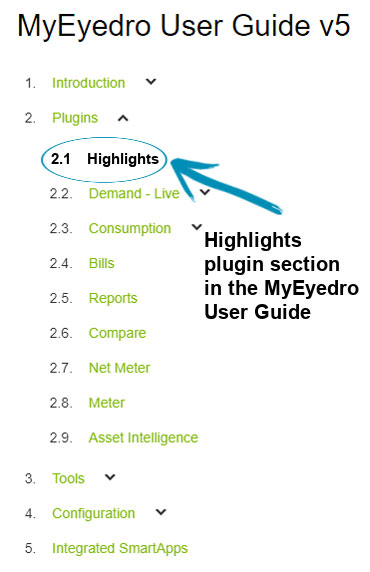
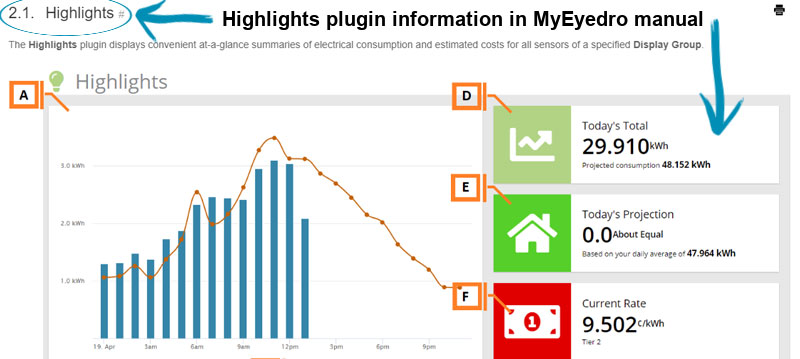
You have now been directed to the Highlights plugin information in the MyEyedro User Guide:

The MyEyedro User Guide section index.
The Highlights plugin information in the MyEyedro User Guide.

In addition to the direct cloud support links from your MyEyedro account to the MyEyedro user manual, there are also informative video tutorials, articles, and Eyedro FAQs.

Energy Monitoring Made Easy

Suggested Next Topic:


MyEyedro Support Videos

Eyedro User Manuals

For detailed Eyedro product specifications, installation, and MyEyedro cloud software information please refer to the following Eyedro manuals:

MyEyedro Cloud Software Manual
Eyedro Home Products Guide

Eyedro Business Products Guide

Eyedro Technical Support

Invert Your MyEyedro Measurement Polarity

Invert Your MyEyedro Measurement Polarity

Invert Your MyEyedro Measurement Polarity

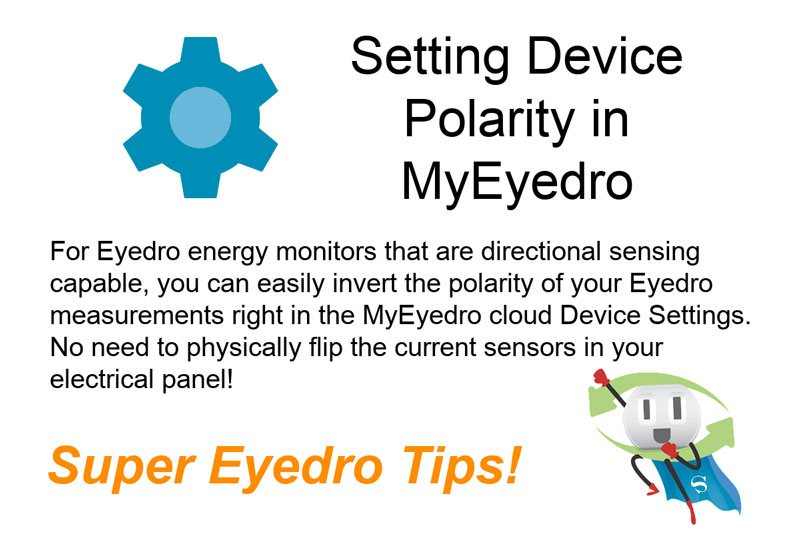
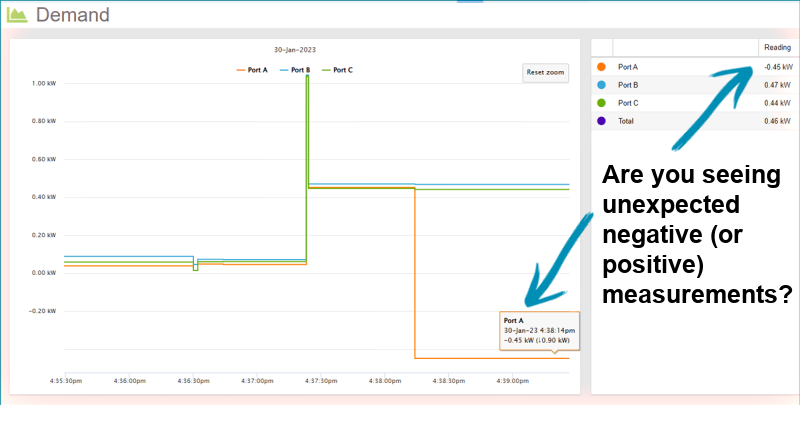
Are you seeing unexpected negative polarity?


If you are seeing measurements that are the opposite of what you were expecting (positive or negative), you can change them in your MyEyedro account:


  1. Go to the Configuration menu, then select Devices.
  2. Select the affected device from the Device list.
  3. Click on Edit Device Settings.
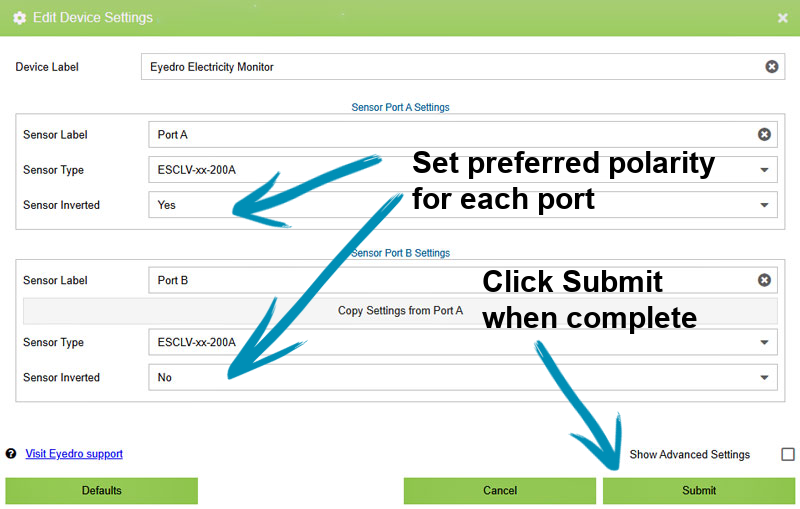
  4. For each affected port select Sensor InvertedYes or No.
  5. Hit Submit!
MyEyedro Demand Live plugin showing Port A negative polarity.

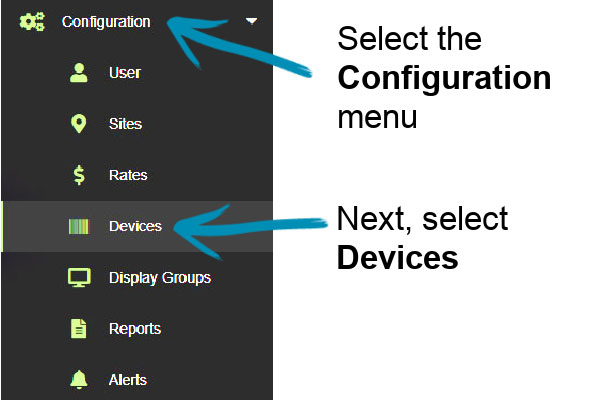
Expand the Configuration menu then select Devices:

MyEyedro Configuration menu

For each port (sensor) that is the incorrect polarity, change Sensor Inverted to Yes or No

Click Submit when you have finished making settings changes:

MyEyedro Sensor Inverted Settings

It may take a minute for the polarity change to appear in your MyEyedro data.

That was easy!

Energy Monitoring Made Easy

Eyedro User Manuals

For detailed Eyedro product specifications, installation, and MyEyedro cloud software information please refer to the following Eyedro manuals:

MyEyedro Cloud Software Manual
Eyedro Home Products Guide

Eyedro Business Products Guide

Eyedro Technical Support

Super Eyedro Tips: Display Groups

Super Eyedro Tips: Display Groups

Customize Your Display Groups

Custom Display Group

Energy Monitoring Made Easy

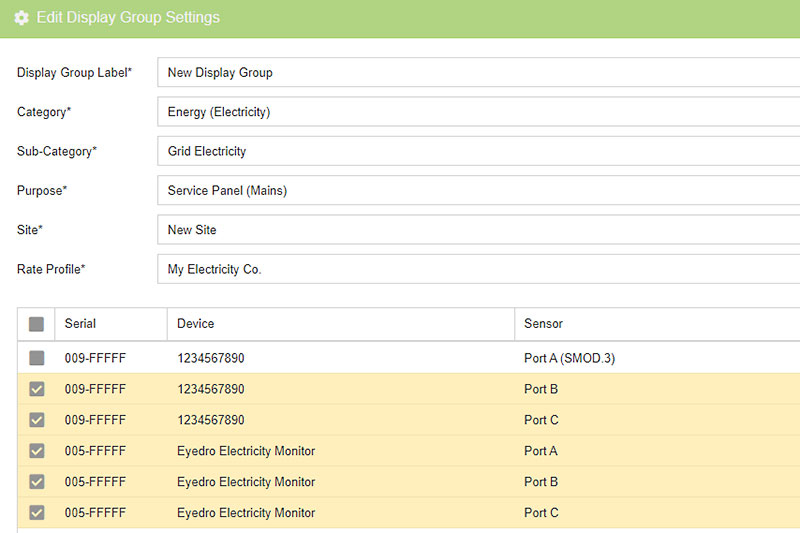
In your MyEyedro account, you have the ability to tailor your experience by creating custom sensor groupings called Display Groups.

A Display Group can include any of your electricity device sensors from one to all sensors.

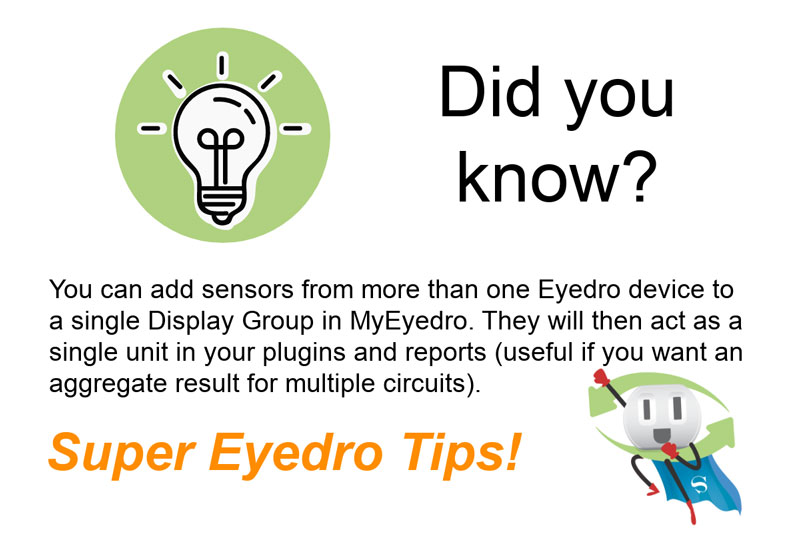
A Display Group appears in your plugins (Highlights, Demand Live, Consumption), where it reports as a single unit.  Reports can also be created by Display Group.

Wherever you want to show an aggregate result for a specific combination of sensors, create a custom Display Group.  Give your Display Group a good, recognizable name!

Unlock advanced alerts, asset intelligence, asset profiles, advanced reports, RETScreen Integration, and more with a MyEyedro Pro license.

Eyedro User Manuals

For detailed Eyedro product specifications, installation, and MyEyedro cloud software information please refer to the following Eyedro manuals:

MyEyedro Cloud Software Manual
Eyedro Home Products Guide

Eyedro Business Products Guide

Eyedro Technical Support


Super Eyedro Tips: WiFi Signal Strength

Super Eyedro Tips: WiFi Signal Strength

Signal Strength is Key

WiFi strength at panel

Energy Monitoring Made Easy

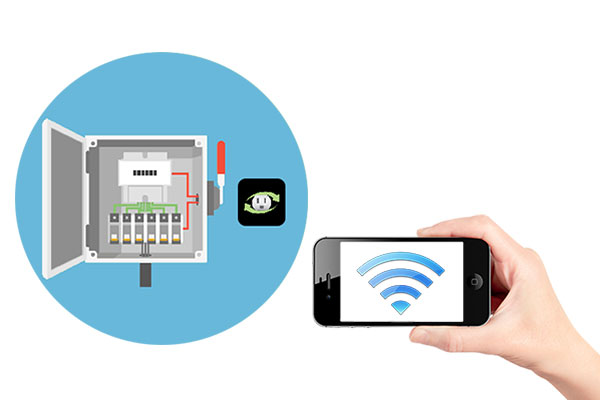
WiFi signal strength can be checked with any mobile device that is connected to your home or business WiFi network.  Simply take your phone, tablet or computer to the spot where your WiFi connected Eyedro module will be installed (beside your electrical panel), and check the strength of the signal.

Eyedro WiFi connected devices communicate over your router’s 2.4 GHz band.  Newer routers are often dual band (2.4G & 5G). Make sure that you select the correct network when testing signal strength and setting up your Eyedro.

Ensuring that you have full WiFi bars will help prevent connection drops and provide you with the best energy monitoring experience!

*Note: never install your wireless Eyedro module inside the metal panel as this will severely disrupt the signal from the device to your router.


Eyedro User Manuals

For detailed Eyedro product specifications, installation, and MyEyedro cloud software information please refer to the following Eyedro manuals:

MyEyedro Cloud Software Manual
Eyedro Home Products Guide

Eyedro Business Products Guide

Eyedro Technical Support