
Add Asset
To add an asset, navigate to the Assets Configuration plugin. Click the ‘Add Asset‘ button located below the list. This will open a form which is used to select the associated display group and profile.
IMPORTANT: Only display groups comprised of device sensors with pro licenses will be available for selection. If you don’t see your display group, see Display Groups Configuration and/or Devices Configuration plugin(s) to ensure you have the appropriate license.

After you’re satisfied with the selections, Click ‘Submit‘ to add the asset and proceed to the settings editor form.
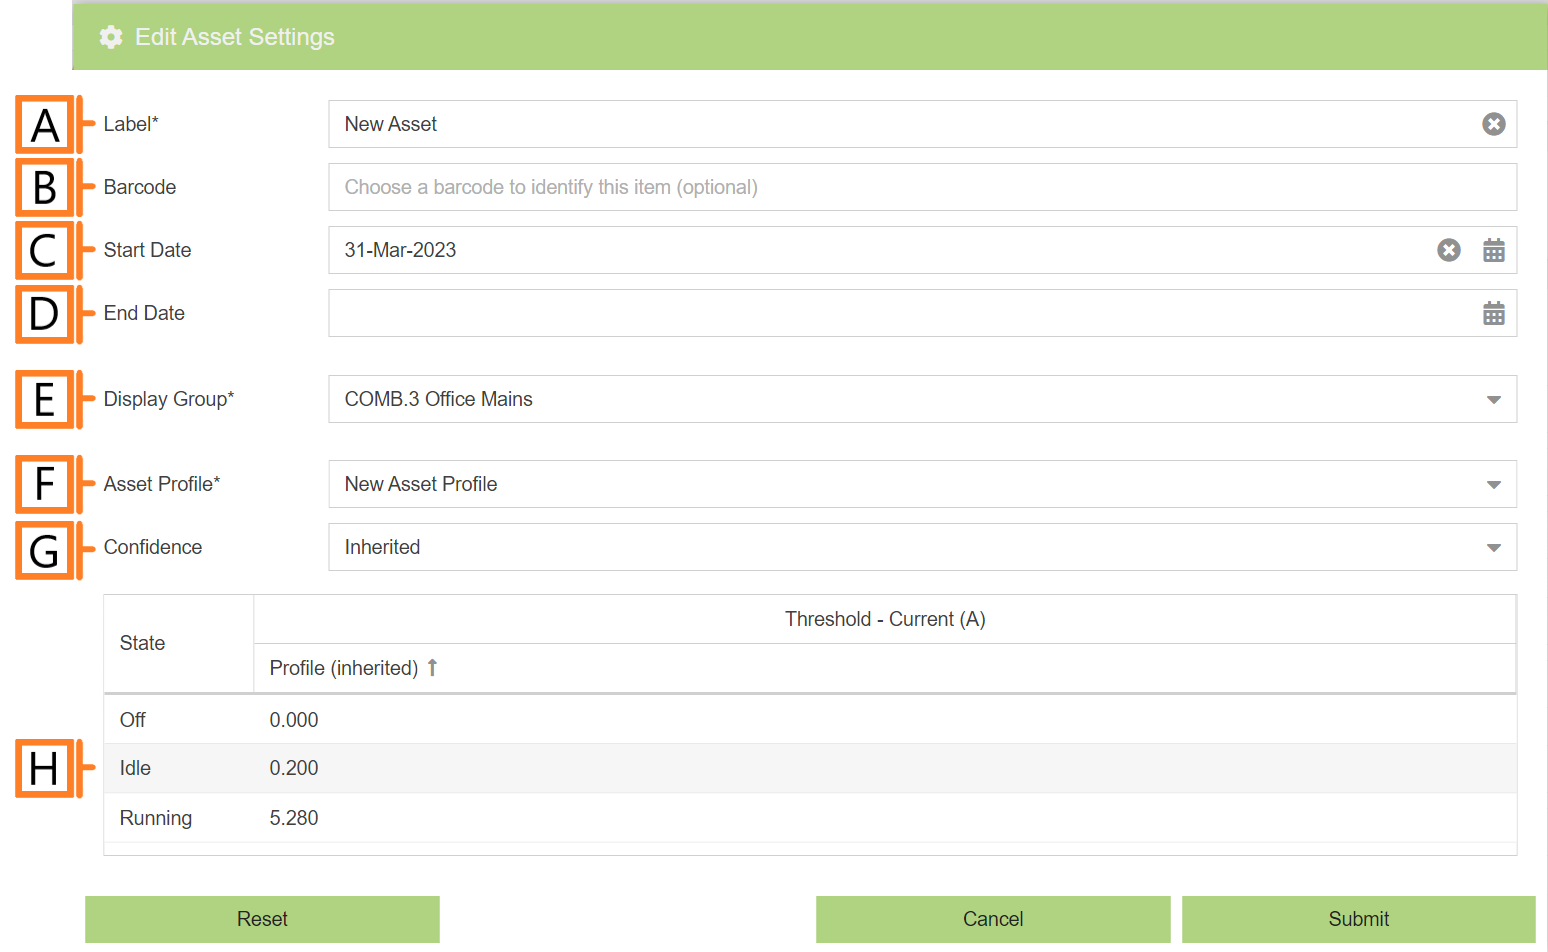
- Label. Label should be unique and descriptive for easy identification.
- Barcode (Optional).
- Start Date (Optional). Defaults to the current date. NOTE: If set to a date prior to the underlying device being installed, the state data will always be “Off”.
- End Date (Optional). Defaults to empty (no end). This field can be used if at some point in the future, the asset no longer exists.
- Display Group. This value should match the one selected during the add.
- Asset Profile. This value should match the one selected during the add.
- Confidence. Field for specifying run-state threshold confidence. Thresholds can be Inherited from the Asset Profile, Verified as correct or Overridden for each asset.
- Run-state Thresholds. NOTE: When Confidence is set to Overridden a new editable column will appear. Double clicking on a row will allow you to edit the state threshold values for the specific asset. The new value will not affect the asset profile or any of the other assets associated with it.
After you’re satisfied with the data entered, Click ‘Submit‘. The newly created asset will now appear in the list.